


If you’ve encountered the message “Pre Memory CPU Initialization Is Started” during your computer’s boot process, you might be wondering what it means and how it affects your system. This stage is crucial in the startup sequence as it ensures that the CPU and memory components are initialized correctly before the system proceeds to load the operating system.
“Pre memory CPU initialization is started” refers to the early stage of a computer’s boot process where the system firmware (BIOS/UEFI) initializes the CPU before accessing memory. This step ensures proper hardware function before proceeding to memory and device checks.
In this guide, we’ll break down what pre-memory CPU initialization is, why it matters, and how to troubleshoot issues related to it.
Understanding the Boot Process!
1. What Happens When a Computer Starts?
When you press the power button on your computer, a series of processes take place before the operating system loads. The BIOS (Basic Input/Output System) or UEFI (Unified Extensible Firmware Interface) takes charge of initializing the hardware components, including the CPU and RAM.
2. Role of BIOS and UEFI:
The BIOS or UEFI firmware is responsible for:
- Detecting connected hardware components
- Initializing essential parts like the CPU and RAM
- Running diagnostic checks to ensure everything is functioning properly
- Handing control over to the operating system bootloader
What Is Pre-Memory CPU Initialization?
Pre-memory CPU initialization is the first step when a computer starts up. During this stage, the system begins recognizing and setting up the CPU and memory before loading other components. This process is important because it ensures that the CPU can access the necessary memory to continue booting.
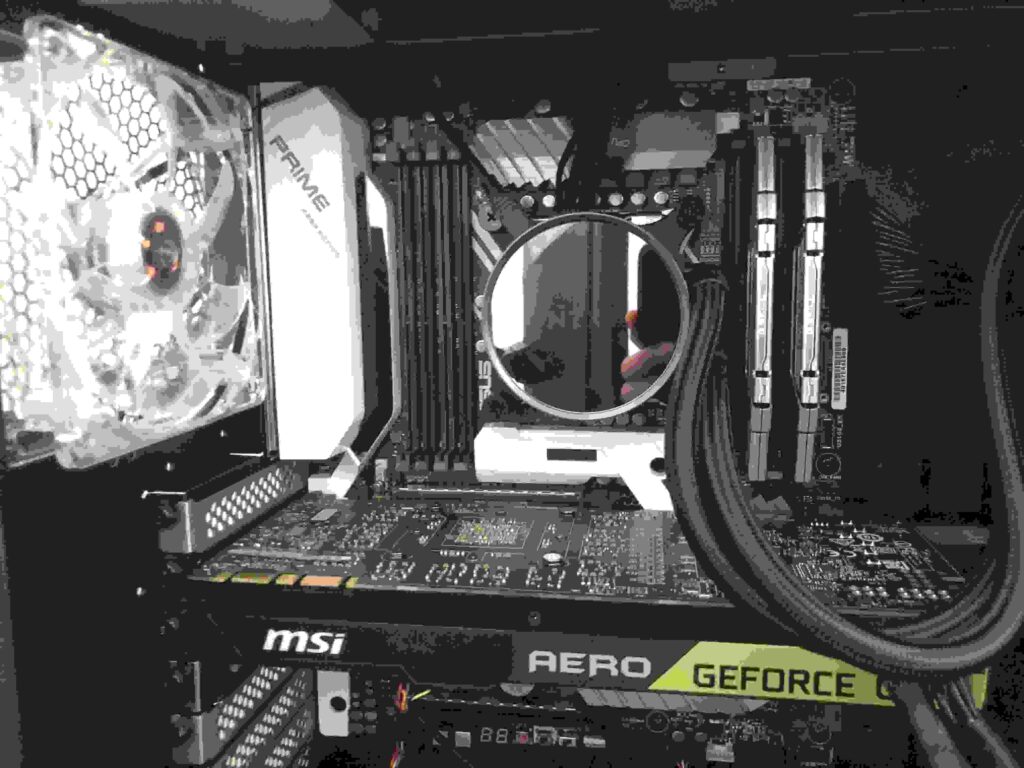
The CPU first performs a self-check to make sure it is working correctly and then detects the installed RAM. After that, the system goes through a memory training phase, where it tests the memory and optimizes its performance. This step helps the system use memory efficiently and ensures smooth operation. Once the memory is set up, the computer moves to post-memory initialization, where other hardware components, such as storage drives and peripheral devices, begin their setup.
The BIOS plays a key role in this process by making sure the CPU and memory communicate properly. It checks for compatibility issues between the processor and memory, helping prevent errors that could cause system failures.
Common Errors During Pre-Memory CPU Initialization!
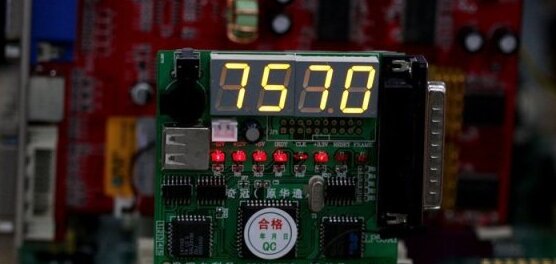
When something goes wrong in this phase, your computer may fail to boot. Common indicators include:
- Continuous beep sounds
- Debug LED lights showing CPU or memory errors
- System stuck at boot with no display
Causes of Pre-Memory CPU Initialization Issues:
- Faulty RAM modules: Bad or improperly seated RAM can cause boot failures.
- CPU compatibility issues: Some CPUs may not be supported by certain motherboards.
- Corrupt BIOS settings: A misconfigured or outdated BIOS can prevent initialization.
- Power supply problems: Insufficient power delivery can disrupt CPU initialization.
Common Issues During Pre-Memory CPU Initialization!
When “pre memory CPU initialization is started,” certain issues may arise, preventing the system from booting properly. These issues often stem from faulty hardware, incompatible BIOS settings, or damaged CPU components. A common problem is an improperly seated CPU, which can cause initialization failures.
Additionally, outdated firmware or incorrect BIOS configurations may prevent the CPU from progressing beyond this stage. Troubleshooting involves checking hardware connections, updating the BIOS, and ensuring all components are compatible with the motherboard.
How to Fix Pre-Memory CPU Initialization Issues?
1. Checking RAM Modules:
- Remove and reinsert RAM sticks.
- Try using different RAM slots.
- Run a memory diagnostic test.
2. Updating BIOS or UEFI:
- Visit the motherboard manufacturer’s website.
- Download the latest BIOS update.
- Follow the instructions to update safely.
3. Verifying CPU and Motherboard Compatibility:
- Check the motherboard manual for supported CPUs.
- Ensure the latest firmware update supports your CPU model.
4. Resetting BIOS Settings:
- Enter BIOS and choose the reset-to-default option.
- To reset settings, take out the CMOS battery for a few minutes.
5. Checking Power Supply Connections:
- Ensure the CPU power connector is properly seated.
- If there is another power supply unit available, try utilizing it.
Troubleshooting Steps for Pre-Memory CPU Initialization Issues!
If your system is stuck at “pre memory CPU initialization is started,” use the following table to diagnose and resolve the issue effectively.
| Issue | Possible Cause | Solution |
| No display, no boot | CPU not seated properly | Reseat the CPU and check for bent pins |
| Beeping sounds from motherboard | RAM issues | Reseat RAM sticks or try different slots |
| System powers on but doesn’t proceed | Outdated BIOS | Update the BIOS firmware to the latest version |
| Error message during boot | Corrupted BIOS settings | Reset CMOS by removing the motherboard battery |
| Continuous reboots | Power supply issue | Check PSU connections and ensure sufficient power |
Following these steps can help resolve problems during the “pre memory CPU initialization is started” phase and allow the system to proceed with the boot process.
Advanced Troubleshooting Techniques!
- Test the system with a different CPU.
- Boot using minimal hardware to isolate issues.
- Seek professional help if problems persist.
How to Fix Pre-Memory CPU Initialization Errors?
If you see an error during the “pre memory CPU initialization is started” phase, start by checking your hardware. Make sure all components are properly connected by reseating the CPU, RAM, and power cables. Sometimes, a loose connection can cause the issue. Updating the BIOS to the latest version can also help because it improves compatibility and increases the chances of successful initialization. If the BIOS is outdated, it might not support your CPU properly, leading to errors. Resetting the CMOS can be another useful step. You can do this by removing the motherboard battery for a few minutes and then putting it back in. This will restore the BIOS settings to their default state, which might fix the problem.
If the error still appears after these steps, you may need to check your hardware further. One way to do this is by testing the CPU on a different motherboard to see if it works correctly. If the CPU works fine on another board, then your original motherboard might be faulty. In some cases, a defective power supply or RAM can also cause issues, so testing different components one by one can help find the root of the problem. If you discover a faulty part, replacing it may be the only way to fix the issue. Taking these steps can help you troubleshoot and resolve the problem effectively.
Preventing Pre-Memory CPU Initialization Errors!
- Regularly update BIOS and firmware.
- Handle RAM and CPU installations carefully.
- Use high-quality power supply units.
FAQs:
1. What does “Pre Memory CPU Initialization Is Started” mean?
It refers to the phase where the CPU and memory are initialized before booting.
2. How do I fix pre-memory CPU initialization errors?
Check RAM, update BIOS, and ensure proper CPU installation.
3. Can a faulty RAM cause pre-memory CPU issues?
Yes, bad or improperly seated RAM can cause boot failures.
4. Why is my motherboard stuck on the pre-memory CPU initialization stage?
It could be due to CPU incompatibility, faulty RAM, or BIOS corruption.
5. Does updating BIOS help with CPU initialization errors?
Yes, a BIOS update can resolve compatibility and initialization issues.
Conclusion:
Understanding “Pre Memory CPU Initialization Is Started” helps in diagnosing and fixing boot issues efficiently. By following the troubleshooting steps outlined above, you can resolve most problems and ensure a smooth startup process.


