Upgrading your computer’s processor can be one of the most exciting ways to boost performance—but many users wonder, are CPU plug and play? In simple terms, “plug and play” means you can just install the new part, turn on your PC, and it works instantly. While this sounds ideal, the reality with CPUs is a bit more complex. Compatibility, BIOS updates, and proper installation all play a big role in whether or not a CPU will work right out of the box.
CPUs are not fully plug and play. While some may work after installation, most require BIOS updates, motherboard compatibility, and proper setup. Always check your system specs before upgrading to ensure smooth performance and avoid issues.
In this article, we’ll break down what “plug and play” really means for CPUs and what you should know before swapping yours out.
Understanding How CPUs Work!
1. What is a CPU?
The CPU, or Central Processing Unit, is the brain of your computer. It does all the heavy lifting when it comes to processing instructions, running software, and basically keeping your system alive. Given its importance, it’s not surprising that replacing it isn’t always as simple as plugging in a mouse.
2. CPU Architecture and Compatibility:
CPUs come in different architectures (like x86, x64, ARM) and designs depending on the brand and model. AMD and Intel, the two big CPU giants, use different socket types. So the answer to “are CPU plug and play” depends a lot on whether the CPU even fits your motherboard.
Are CPU Plug and Play?
Here’s the simple answer to the question: are CPU plug and play? Not really. Unlike USB drives or keyboards, CPUs are not truly plug and play. While some CPU upgrades might seem easy, there’s usually a lot more involved. Before installing a new CPU, you need to check if your system is ready for it. One of the first things to look at is the BIOS, which is the system that helps your computer start up. If the BIOS is not up to date, it might not even recognize the new CPU, and your computer won’t turn on. So, are CPU plug and play? Not unless the BIOS is updated and ready to work with the new processor.

Another thing to think about is the motherboard. Every motherboard is made to work with certain types of CPUs. It depends on the socket type and chipset. If you try to install a CPU that doesn’t match the motherboard’s requirements, it just won’t work. So again, are CPU plug and play? Only if the CPU is the right match for the motherboard. Even if everything fits and your computer turns on, you might still need new drivers or software updates so the operating system can fully use the new CPU. Windows might try to set it up automatically, but it doesn’t always work perfectly. So overall, CPUs are not fully plug and play. You need to make sure everything is compatible and properly set up.
Key Requirements Before Swapping a CPU!
1. Check Motherboard Socket Type:
Your CPU must physically fit the motherboard. AM4, LGA1700, LGA1200, TR4 — these are just a few socket types. Mismatching them is like trying to jam a square peg in a round hole.
2. Confirm BIOS Support:
Even if the socket matches, the CPU must be on the motherboard’s supported CPU list. Updating the BIOS might fix this, but not always.
3. Power Supply Considerations:
Higher-end CPUs often require more power. Check your PSU’s wattage and 12V rail performance before making the swap.
4. Cooling and Thermal Paste Needs:
You’ll need a compatible cooler and some thermal paste. Some CPUs don’t come with coolers anymore, so plan ahead.
Operating System and CPU Recognition!
- Windows will usually recognize a new CPU automatically in most situations.
- If you’re switching CPU brands (e.g., from AMD to Intel or vice versa), complications can arise.
- It’s sometimes safer to reinstall Windows after changing CPU brands to avoid compatibility issues.
- If you don’t want to reinstall Windows, a full driver cleanup is highly recommended.
- Use DDU (Display Driver Uninstaller) to remove old GPU and chipset drivers before installing new ones.
- For AMD systems, use the AMD Cleanup Utility to completely remove existing drivers.
- After uninstalling old drivers, install the latest chipset drivers for your new CPU.
- Always download the new drivers directly from the CPU or motherboard manufacturer’s website.
- Restart your PC after each driver cleanup and driver installation step.
- Monitor system performance and device manager for any errors after the CPU swap.
- Consider updating your BIOS if your motherboard doesn’t support the new CPU out of the box.
The Role of BIOS in CPU Installation!
Updating the BIOS on your computer can be very important, especially if you want to use a newer CPU that your motherboard didn’t originally support. Sometimes, when a new processor is released, it won’t work with older motherboards unless a BIOS update is done. That’s why motherboard manufacturers often release updated versions of the BIOS—to help your board work with new CPUs.
These updates make sure the motherboard and processor can understand each other and work properly. Without the update, your system might not start, or it could have issues. So, if you’re planning to upgrade your processor, it’s a good idea to check if your BIOS needs an update to support it.
To update the BIOS for CPU compatibility, you should go to the official website of your motherboard’s brand. Most of the time, they list the BIOS files for your specific model and give step-by-step instructions on how to install them. Some motherboards also come with special tools like “Q-Flash” or “EZ Flash.”
Risks of Swapping CPUs Without Proper Prep!
1. Boot Failures:
Your PC might not even start if the BIOS isn’t ready for the new CPU.
2. Hardware Damage:
Applying too much pressure, using the wrong cooler, or bending pins can damage the CPU or board.
3. System Instability:
Random crashes or thermal issues might happen if drivers or cooling solutions aren’t up to par.
Are CPU Plug and Play on Laptops?
Most laptop CPUs are soldered directly to the motherboard, which means they are permanently attached and cannot be easily removed or replaced. This is very different from desktop computers, where you can simply unplug the old CPU and swap in a new one.
The reason for soldering the CPU is mainly to save space and make the laptop more compact, as there is less room for additional components. Because of this, if your laptop’s CPU stops working or becomes outdated, you won’t be able to upgrade it like you could with a desktop.
In very few cases, some older or high-end workstation laptops use socketed CPUs, which are easier to replace. However, these laptops are rare, and in most cases, you cannot just swap out the CPU. So, to answer the question of whether laptop CPUs are plug-and-play like in desktops: the answer is no, they are not.
Are CPU Plug and Play in Prebuilt Systems?
1. Locked BIOS and Custom Parts in OEM PCs:
Dell, HP, and others often use custom boards and locked BIOS. Even if a CPU technically fits, it might not boot.
2. Workarounds for Upgrading in OEM Machines:
Sometimes flashing a modded BIOS works, but this is risky. You’re better off calling support or checking with the community.
DIY CPU Upgrade – Step-by-Step!
1. Tools You’ll Need:
- Screwdriver set
- Thermal paste
- Isopropyl alcohol
- Antistatic wrist strap
- New CPU and cooler
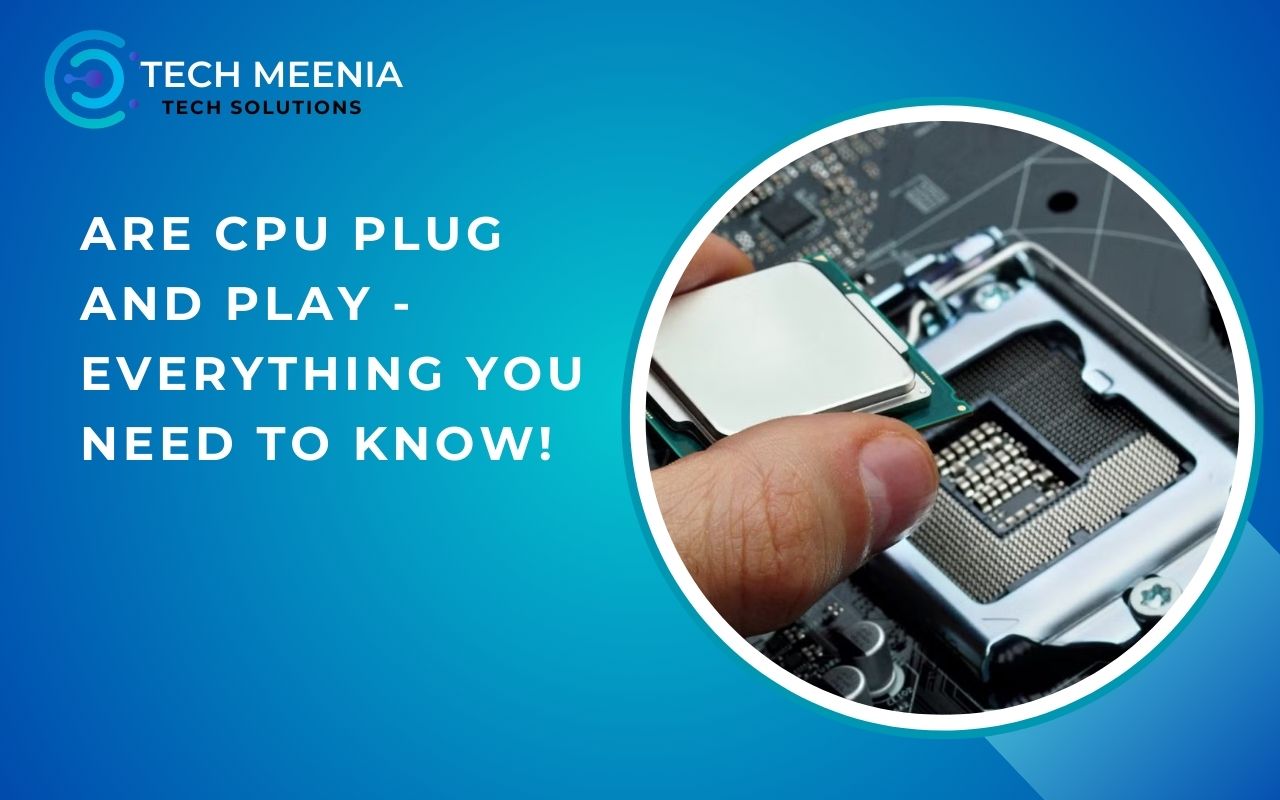
2. How to Install a New CPU Properly:
- Power off and unplug the PC.
- Remove the old cooler.
- Lift the CPU socket latch and remove the old CPU.
- Insert the new CPU correctly (match the triangle).
- Apply thermal paste.
- Reinstall the cooler.
- Boot and update BIOS if needed.
How to Check if Your CPU Upgrade Will Work?
When you’re building a PC, it’s really important to make sure all your parts work well together. One of the best ways to do this is by using online compatibility check tools. Websites like PCPartPicker can help you figure out if your chosen parts—like your motherboard, processor, and RAM—are all compatible. These tools are super easy to use and can save you a lot of trouble. Some computer part manufacturers also have their own compatibility lists, which you can find on their websites. These lists show you which parts are tested to work with each other. Using these tools can help you avoid wasting money on parts that won’t fit or work properly in your build.

If you’re still not sure about something or just want advice from people who have done it before, asking other PC builders can be very helpful. Online forums like Reddit’s r/buildapc or Tom’s Hardware are full of people who have built many PCs and are happy to share what they know. You can ask questions, read about other people’s builds, and learn from their experience. These forums are great places to find answers to specific questions and to double-check if the parts you’ve picked will actually work well together. Getting advice from real users can give you extra confidence before you buy anything.
Should You Upgrade Your CPU Yourself?
1. Pros and Cons of DIY CPU Installation:
Pros: Cheaper, fun, and satisfying.
Cons: Risky if done wrong, may void warranties.
2. When to Ask for Professional Help:
If you’re unsure about BIOS updates, thermal paste, or socket types, it’s okay to ask a tech to handle it.
FAQs:
1. Are CPU plug and play if I upgrade within the same generation?
Sometimes. If your motherboard and BIOS already support the new CPU, the process might be close to plug and play. Still, it’s smart to double-check everything first.
2. Do CPUs come with their own drivers?
Not directly. However, installing a new CPU may require chipset drivers or updates from the motherboard manufacturer to function optimally.
3. Are CPU plug and play if I use Windows 11?
Windows 11 can recognize many CPUs automatically, especially if they’re compatible. But you still need to ensure BIOS and motherboard support is in place before expecting full plug and play functionality.
4. What happens if I install a CPU that’s not supported?
The computer may fail to boot, or worse, you could damage your CPU or motherboard. Always check compatibility lists before installation.
5. Are CPU plug and play on Mac systems?
No. Macs are highly integrated systems. Their CPUs are not meant to be replaced or upgraded by users, especially in recent models with Apple silicon.
Conclusion:
So, are CPU plug and play? In the purest sense — no. CPUs need careful planning, BIOS compatibility, and hardware checks. While modern systems make the process smoother, it’s still not as simple as plugging in a USB stick. That said, with the right prep, tools, and research, upgrading your CPU doesn’t have to be scary. Just don’t expect it to be plug and play without doing your homework.
Also Read:
- Intel i9 CPU Overheating on Gamers Nexus – Motherboard Compatibility and Cooling Challenges!
- New CPU Installed fTPM/PSP NV Corrupted – All Guide!
- Ntel I9 Cpu Overheating Motherboard Setting – Everything You Need To Know!
- The Ultimate Guide to Choosing the Best CPU Fan for 7800X3D
- RPCS3 CPU Tier – A Top-Tier CPU With Unmatched Single-Core Performance!